Monday, December 28, 2009

Pete

Meet Pete:

Pete and I are headed to Egypt. This may be taken literally or it may mean that I’m going crazy, you’ll have to stay tuned to find out.

Pete is my friend Aly’s Choreography Lamb. I made Pete from a free lambkin softie pattern from allsorts. Pete is a “choreography” lamb because he is made from a “choreography” sweater (ie: a sweater worn while choreographing) which had a special meaning to Aly and was used in the creation of Ren’s quilt.

I will try to provide updates on the adventures that Pete and I have based on internet availability during our journey. However, you may just have to wait until we get back to find out what happened.

Thursday, November 19, 2009

Mini-Lonestar

While making Annie's graduation Lonestar quilt I made one lonestar and decided that it was too small for the quilt I wanted to make. So, I made a second, larger lonestar. Since I had already completed the smaller lonestar I decided to use it to make a baby quilt for a coworker who was having a baby.

She knew it would be a boy so the blue lonestar would work great. I had planned to have it complete before this past Wednesday because we were going to have a shower for her at work, but she had the baby early, so I had extra time. I finished the quilt tonight, so I think I'll try to visit her this weekend.


For the quilting I stitched-in-the-ditch for the lonestar and used some decorative designs from my Fons and Porter's Quilter's Complete Guide and increased the size to better suit my lonestar.

Sunday, October 11, 2009

Dress for Lexy

Lexy's 20th birthday was a couple weeks ago and she wanted me to make her a dress. While they probably don't get much use in Portland, Lexy loves sundresses and when I found a pattern for a simple shirred top sundress on Craftzine's blog she asked me to make her one.

For fabric she wanted something yellow or purple with a pattern so I bought this fabric from fabric.com:


I also had to buy elastic thread (couldn't find it on the island) and unfortunately the 11 yd spool from fabric.com wasn't quite enough so I had to get this instead:


To use elastic thread you need to hand wind it on a bobbin, being careful not to stretch it while winding. Like some decorative metallic threads the elastic thread is too thick to thread through a sewing machine and needle, so instead it goes on the bobbin.

When shirring the top (making the rows of elastic to gather the top) you sew rows from the right side (as opposed to the wrong side) of the completed dress in a continuous line that circles around the bodice for about 6-8" down from the top of the dress. The elastic ends up on the inside of the dress and the tension from the top thread helps to gather the fabric. You line of the edge of the presser foot with the previous row to keep them parallel and it's very important to pull the fabric flat while sewing.


One problem I had was that the amount of elastic thread that can be wound on a bobbin is not enough to complete the top. It took about 3 bobbins and when one ran out I'd just overlap the beginning of the next bobbin over the end of the last.

I shortened the pattern from Heather Ross significantly and according to Lexy it is still too long for her, so I'll have to shorten it when she is home for Christmas. Here's Lexy in the dress:

Sunday, October 4, 2009

Shopping Tote

A trip to Costco today brought up one of my pet peeves about our society: packaging. So many things that are sold these days come in massive amounts of packaging. For me, this not only seems a waste, but as a very lazy person it means more work for me, either dumping the rubbish, or going to the recycling center.

The biggest annoyance are plastic bags. If you've ever driven past the central Maui landfill you know what a problem throwing them out can be. I quit my Masters program in Environmental Policy and Management because I'm not enough of an environmental nut to care that much, but plastic bags seem excessively wasteful even to me.

Needless to say I was thrilled when reusable bags started popping up all over Maui. My favorites were from Star Market, because they folded up nicely:

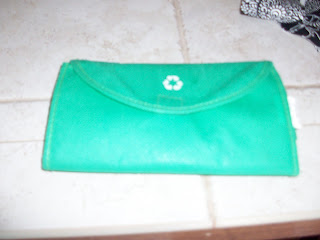

Unfortunately the recycled material they were made wasn't exceptionally strong and the handles started ripping. So, I decided to use the bags I had as a pattern and made my own. Here's how!

What you'll need:

1/2 yard of heavy-weight fabric 60" width
1" of velcro
1 1/2 yards of 1/4" double fold bias tape*

Cutting:

Fold the fabric in half to cut the following:

1 Rectangle 33" x 16.5"
2 Strips 17" x 2.5"
1 Rectangle 7.5" x 11.5" (one end will be rounded off)


The handles are folded in half, right-sides together and sewn with 1/4" seam and turned right side out. I over-stitched the edge with the seam to help the handles keep their shape.

After rounding one end of the pocket as shown below, cover the edge of the pocket all the way around with the double fold bias tape (*I'll discuss an alternative at the end). Sew the velcro in place (the fuzzy side is sewn on the outside of the pocket, 2" from the top edge, the pokey side is sewn on the under side of the flap).


The rounded edge of the pocket will end up as a flap. When you sew the pocket to the bag, the bottom seam will be 8" from the top (the dashed line in the drawing), not along the curved edge. Sew the pocket to the bag 4 3/4" from the top edge of the bag and 3 3/4" from the fold that creates the bottom of the bag.

The handles are sewn at each end with each side of the handle 2 1/4" from the center. The edges of the handles will line up with the top edges of the bag. When the top is hemmed the handles will stand up.


Fold the bag in half, right sides together and sew edges together. Finish by hemming the top of the bag under by about 1". Topstitch as close as possible to the top edge of the bag to secure the handles. Finally, fold up, pressing as you go to establish the folds for future use.


*Some notes and suggestions.

Instead of using bias tape around the pocket you could line the pocket by cutting two of the pockets (there will be enough fabric in your 1/2 yard) and sewing them right sides together along the long sides and curved end and then turning right side out and folding under the top. When cutting, you'd need to add at least a 1/4 inch all around the pocket for seams.

Also, if you want you can line the bag. You'd need an additional 1/2 yard of lining fabric from which you'd cut an extra bag piece (you wouldn't need to do extra handles, and if you want to line the pocket, as above, you could do so from either the outer fabric or the lining fabric). You'd sew the two bags separately (the lining would be sewn with the right side in), and place the inner bag in the outer bag before hemming and hem the outer bag over the inner bag (the inner bag should be about 1" shorter than the outer bag).

Wednesday, September 16, 2009

Waffle Week

Those of you who keep up with me on Facebook and/or Twitter should know that I have declared this week "Waffle Week." It was a little last minute, brought on by Monday's Get Fuzzy so I didn't have a lot of time to prepare. Fortunately I bought a box of frozen waffles at Costco last week so at least I have waffles to eat. But a truly Crafty-Ass Chick would have found a waffle related crafting project to do in honor of Waffle Week. Oops.

So, instead of being crafty myself I will share a story of someone else's craftiness that involves two things I love: waffles and the University of Oregon.

Bill Bowerman was the track coach at the University of Oregon in the 1960's and coached the infamous Steve Prefontaine. Bill Bowerman also went on to co-found Nike with Phil Knight, a University of Oregon alum and former runner. Knight worked the business side while Bowerman experimented with Shoe design.


While coaching for Oregon he learned to cobble and custom made shoes for his runners. In order to create a lighter shoe Bowerman did some waffle inspired crafting.

Bowerman and his wife often ate waffles for breakfast - not an unusual or special event for them. Yet one morning, while thinking about his shoe designs and eating waffles, Bowerman had a flash of inspiration. He ran into the garage with the waffle iron and poured rubber on it. With that one idea Bill created Nike's now famous waffle soul. As it turned out, when place on a lightweight shoe, the waffle sole gripped running tracks better than the established ripple soul. It soon became a major success story.

So that is how waffles changed sports forever!

Hooray waffles!

Friday, September 4, 2009

Another Old Post from MySpace


Sunday, June 10, 2007

I went to a baby shower today, so yesterday I was looking for a gift. I don't know much about baby stuff and what's hot in infant couture right now, so I was a little perplexed by what I should get.

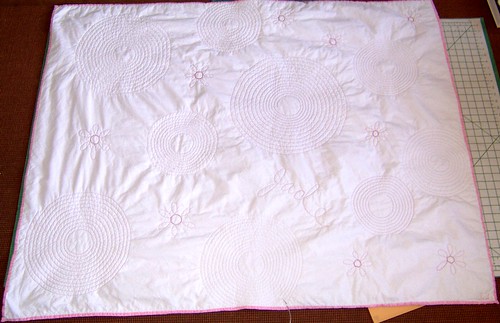
Well, yesterday I also happened to be shopping for costume stuff, so I was in the fabric section and thought, I should have made a little quilt. I made one recently four Lexy's graduation...it took me four years. But I thought if I simplified things I could do it in one day. So I bought some fabric and headed home.

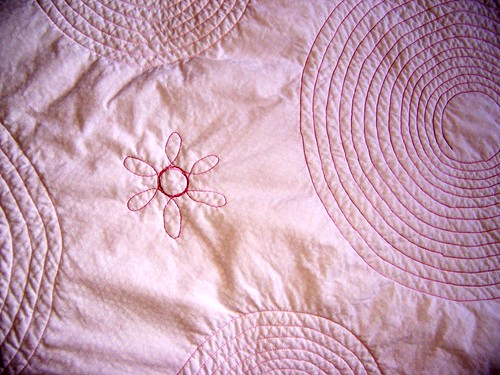
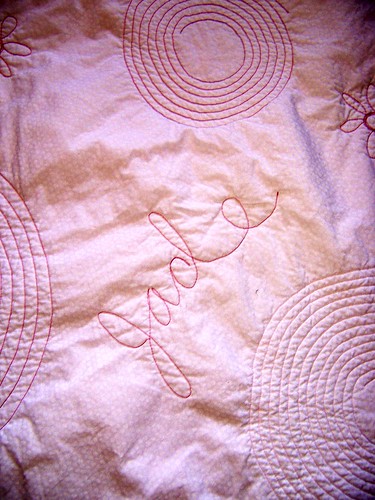
I simplified things by doing absolutely no piecing. I made a sandwich of pink and white fabric (with batting as the bologna) and all the exciting stuff went into the quilting part.

And it worked! In less than 24 hours I had made a quilt. Granted it would have been a lot nicer if I'd had more time, but there wasn't much more time then the time I did it in anyway.

So here are some pictures of the quilt (front and back):


And some detail because it's hard to see stuff above:


Tuesday, September 1, 2009

Christmas Dress


I found this picture and I love this dress. I love the yoke and gathered bust. I love the cream accents. I sort of love the green – it’s a little dull, but I like the antiqueness of it. I love the cap sleeves and the little bow at the collar. I love the shape of the collar and the piping at the bust.

I want to make this dress.

I don’t think it will be too hard to come up with a pattern for it – I don’t know what the back looks like, but I could guess. I learned a lot about dressmaking for Sound of Music and I think I can take some patterns I already have and adjust them to be what I need. One tricky thing for me would be the pockets – because the SOM dresses didn’t have to be practical I always left out the pockets.

The biggest problem is time. I have so many projects that I want to do and so many that I’ve started that it’s illogical at this time to plan another one. That’s not to say it will never happen, I just think that I’d have to finish 2-3 of the quilts I’m working on and at least one purse I have planned before I could justify a new project. Plus I don’t have a real need for this dress. Yes it’s cute but I don’t know when I’d wear it.

My crafting time is limited since I have a full time job and a social life, so it’s hard to do everything I want to. I think I’d like to learn to knit, but I hardly have time for the crafts I know how to do, so when will I have time to take on a new one. Ack!

I have a whole lot of ideas for future projects. I’ll just have to file this one away for later…

Thursday, August 20, 2009

Lonestar Day 2

Working nights has given me lots of time to sew and I've made all kinds of progress on the star portion of this quilt. Here's what I've done since yesterday:

I sewed strips together to create 4 rows for each point of the 8 point star:


Each set of strips get's cut at 45 degrees to create the rows:


Here's how the four rows go together to create the points:


Sewing the rows together is a little tough because you can't line up the seams because the seams are diagonal. So the seams have to be pinned about 1/4" off so that they intersect where the seam will be to sew them together.

The eight points then become the star:


Now comes the tricky part - sewing the the squares to fill out the corners. This is tricky because the corner on the star is already sewn. More about that next time.

Wednesday, August 19, 2009

Lonestar

Annie will graduate from Pharmacy School in a little under 2 years (right around the time that Lexy will graduate from Nursing school and I'll turn 30). Since I made Lexy a quilt for her graduation from High School I am going to make Annie a quilt for her graduation (I guess that also means I have to take Lexy to Europe for hers - better start saving now). Since, most likely, Annie will never read this blog, I'll document the process of making Annie's quilt.

I'm going with the Lonestar Quilt design because Annie's always liked the name Lonestar - partly because of Space Balls, partly because the first four letters also start our last name. This is how I'd like the quilt to look when it's complete:


The outer stuff is all border, which is pretty easy, so most of the work is involved in the star part. I've bought the fabric, and I'm working now on piecing the star. To create the star you sew strips of different fabrics together and cut them at 45 degrees and sew those together to create the points of the star.

So far I've cut the strips and I'm sewing them together:


I managed to cut all the strips without cutting my fingers (yay!). I'll post some more pictures once I've done some more sewing.

Saturday, August 15, 2009

Collaging

I love collaging. It's whatever you want it to be. It's also very useful. I've used it in costuming to convey a general look that I'm going for rather than drawing out a specific outfit. Most of the shows I do involve pulling or finding clothes rather than making costumes, so I can't say exactly what I want because there's no guarantee I'll find (or be able to afford it). So it's great to make a collage of colors or styles that I'd like to convey how I feel a character should dress.

My freshman year of college I made this collage for my "Clothing and Culture" freshman seminar. It is meant to represent how art/architecture and fashion mimic each other. This is that worked in the year 2000:


Recently, for Best Little Whorehouse in Texas, to help us understand our characters, the Assistant Director has us create a collage based on what we thought was sexy. Here's my "Sexy Collage":


I also like collaging just for fun and for art. Ben Franklin has shadow boxes and I made a couple artsy, 3D collages that now hang on my wall. It combines more than just pictures from magazines, there are pieces that I drew/painted in them as well. The photos aren't great but here they are (I haven't really titled them):

Saturday, August 1, 2009

Mark's Pimp Cup

Woohoo! Two posts in one day. I'm on a roll.

After a rollicking college-like drinking party at my friend Mark's house I somehow managed in my drunken state to remember to grab his pimp cup so that I could bedazzle it for him. It was a little boring, though impressively large.

So, after a hungover tour of Ben Franklin Crafts I used some puffy paint, rhinestones and these cool bubble sticker things from the scrapbook aisle and bedazzled the crap out of that cup. It was reminiscent of the goggles I made for a show once - I'll have to write about it sometime.

Here's the totally awesome bedazzled Pimp Cup:

Ren's Quilt

So, now that I have a follower (yay Jen!) I feel like I should blog since I haven't posted anything since March. I have a couple plans for future posts (I have some free time coming up so I'll be able to craft more), but for now I'll just talk about what I did recently.

Through the theater I have a group of close friends, one of whom just graduated from high school. For her graduation I decided to make her a small quilt, and the others in the group decided to participate and each made a square. Here's the (almost) finished product:


I made the center square and the four side squares. The coffee one is self-explanatory. We're not racist, the burning Canadian flag is because Ren was in a car accident with some Canadians and now has a personal grievance with the entire country because of it. The Diva is because she was a Diva-in-training and has now been granted full Diva status.

The bottom left square (that doesn't really fit in with the color-scheme) is an interesting story. There was one of us who just does not craft, so to make his square we had him donate a meaningful piece of clothing with which I would make a square. The fabric was a bitch to work with, but the jacket it came from was memorable. The cut out's were done via laser cutter which one of the other girls had at work. It was an interesting was to cut, but I don't know if we'll do it again.

It was a fun group project and she loved the quilt when we gave it to her:

Wednesday, March 11, 2009

Pointe Shoes

I am (was) a classically trained ballerina in the Vaganova (Russian) style and danced “en pointe” for 6+ years before and after college (when I took a ballet break). My ballet days are somewhat behind me – I still dance, but my focus is a little more on jazz now – but, ballet will always be a part of me, and I haven’t given it up entirely (see my Zombie Ballerina blog).

My first Pointe shoes were Capezio Aerial II’s (the old style – I don’t like the new style) and eventually I moved on to Grishkos or Russian Class. I kept my first pair for a long time and displayed them proudly, but eventually they died and I had to throw them out. When I moved home after college and had lots of free time to craft I decided to decorate a new pair to replace my first pair.

For one of our performances in high school three of us choreographed a dance to “The Phantom of the Opera.” We had pretty black costumes and wanted to have pretty black Pointe shoes to match. We bought some Rit and stirred up a pot of black Pointe shoe stew in my friend’s yard with her cat nearby to complete our witchy scene.

And after all the “Double double toil and trouble” we learned that you cannot dye Pointe shoes like that. The box of a Pointe shoe (the hard part that supports the toes) is made from rosin (tree sap) and melts in hot water (and the dryer). So we ended up with beautiful black Pointe shoes that were too small and way too mushy to dance on.

So, I had learned my lesson about dying and decided to try another approach when decorating my new shoes (from eBay). I bought some Rit and this time, made a watery paint and painted the dye on with a brush like watercolors. This allowed me to dye the fabric without ruining the shoes as long as I didn’t apply too much at one time to the box (it also came in handy when making my aforementioned zombie ballerina costume). It also let me do some neat things.

I was able to do shading and color variation – I used a bluish/purplish dye and I think I mixed it with some watercolors. Also, I added some glitter to give it a bit of sparkle. I also glued on some sequins, added a bit of pizzazz with some glittery puffy paint, painted the insole and added pretty lavender ribbons. This is how they came out:


I had all kinds of plans for different shoes, but never really kept up with it. The shoes now gracefully adorn the doorknob on my bedroom door.

Monday, March 9, 2009

Curtain Costumes

Some of the most important costumes in “The Sound of Music” are only worn on stage for about a minute – the infamous Curtain Costumes. Not only do the children have to look adorable in them, but they are an important plot point as well.

In the story, as you may recall, the Children – “little marching machines” – are somewhat ignored by their father, a former sea captain, who treats them like sailors on a ship rather than beloved offspring. Maria comes along and teaches the children how to be children and how to sing – the latter being what breaks their father out of his widowhood induced funk and brings the family together again.

The changing point for the captain comes when he returns home a month after Maria arrives to find his children romping about the estate dressed in play clothes made from old curtains. The clothes are made from curtains because he wouldn’t give Maria material to make them clothes, so like a true “make it work” crafter, she used what was available – the old curtains from her bedroom.

The curtain costumes spark a conflict between the Captain and Maria that helps the captain to realize what has happened to his family, and to start falling in love with Maria. So, even though they are seen on stage for only a brief moment, they are vital to the play.

Since the prospects of renting costumes for our production of “The Sound of Music” were rather slim, I decided that these would be built for the show. Originally the lady who was going to assist me was going to make them, but things didn’t work out, so I took on the task.

In an earlier post I mentioned the challenges I had finding fabric on the island, so I ended up ordering some online (from 2 different vendors because Fabric.com only had 11 yards)- Benartex Splendid Holiday Alpine Holiday Pine (Christmas fabric, but it works great). I love this fabric.


I used a variety of dress patterns (one old (1950’s), 2 new, and one I made myself) and copied the Lederhosen I had purchased on eBay for the boys. They are adorable costumes, if I do say so myself.


This picture was in the Maui News article about the show. You can’t really see all of them, but you get an idea of how the fabric worked out (the children were singing when the photo was taken – hence the odd expressions on their faces). I’ll post better ones if I ever get any.

Friday, March 6, 2009

Injuries

I recently re-posted an old blog entry from my Myspace page about sewing through my finger while costuming “Meshuggah-Nuns.” Well, that wasn’t my only crafting injury and not my worst either.

During my work for “The Sound of Music” I cut my finger pretty badly with a rotary cutter. This is a pretty common quilting injury as the rotary cutter is a very popular quilting tool. I was cutting strips to make suspenders for Lederhosen when the blade slipped over my straight-edge and through my left pointer finger. I cut a nice slice off, but not really enough to require stitches. It did however bleed a lot and I had to call a friend to come over and help me out because I was on the verge of passing out.

It was a huge inconvenience because I couldn’t use that finger for several weeks right in the middle of my big push to get all the costumes made. You never realize how important a finger is until you can’t use it. But it’s recovered quite nicely.

Some other injuries I have sustained while crafting include a nice burn on my forearm I received while ironing costumes for “The Foreigner.” I also had a significant hot glue burn on my leg from glue dripping on me while making a hat for “The Spirit of the Iao.”

Injuries happen and I find that most of mine have been due to rushing. If I had just pinned what I had been sewing rather than holding things in place, I wouldn’t have sewn through my finger – but I was rushing and trying to save time. And my advice for the rotary cutter is not to take it lightly and to make sure you think everything through before you do it – and be really cautious about finger placement.

The Sound of Music

I’ve been busy. Very, very busy. For the last two months (+) I have been sewing my ass off for last week’s opening of “The Sound of Music” at the Historic Iao Theater in Wailuku. I do a lot of costume design at the Iao Theater for Mau OnStage, but this is my biggest show by far.

Normally – because I have a full-time job and I don’t have the costuming experience of my colleagues – I get the smaller shows that tend to have more “pulled” costumes (costumes that are pulled from stock or purchased off-the-rack). The big-spring-musicals usually involve a lot of sewing, so for the 4+ years that I have been a costume designer they have always been given to someone else.

Well, this year apparently “they” didn’t want this show so I got it – it’s not like I was asking for it, I’ll pretty much do any show they give me. I knew going in that it was going to be tough and that I would need a lot of help, but I was confident that my persistence and “make it work” attitude would carry me through – plus I was planning on getting an assistant.

An assistant was found – she had previous experience and possible had a complete set of curtain costume for the children – but things didn’t work out entirely. And it took a month for them to not work out, so by the time I realized it, it was too late to get another one. I did have help from a lot of people, but I had been planning on having my assistant make a lot of the children’s clothes and now that I didn’t have one, I was going to have to do that myself.

So, I ended up making a lot more of the costumes than I had anticipated. But I learned a lot about dressmaking in the process. I am very proud of what I made and I think everyone was surprised at what I was able to accomplish. I will go into specifics about what I did for the show in other blogs, otherwise this one could end up being quite lengthy, but I do have a lot to say about what I did and what I learned in this process.

Saturday, January 24, 2009

Another Old Post from MySpace

Do you need stitches when you sew through your finger (November 16, 2005)

So I have been toiling away, sewing in this sweatshop...okay, it's just the women's dressing room at the Iao Theater, but it is darn hot down there. But anyway, I have been working hard in my free time making nuns' habits for the Meshuggah-Nuns! musical that opens Friday (Nov. 18 - Dec. 11, Fri-Sat 7:30pm, Sun 5pm), and yesterday I managed to not only sew the habit that I was working on, but through my finger as well. OUCH!! Fortunately I missed both the bone and the nail, and because it was a sewing machine needle it was quick and straight, and there was very little blood and almost no wound. But it still hurts and it is making this hard to type. Luckily it was on my left hand, but unluckily it was the pointer finger, and I never really realized how much I use my left pointer finger.

Friday, January 23, 2009

Old Post - From MySpace

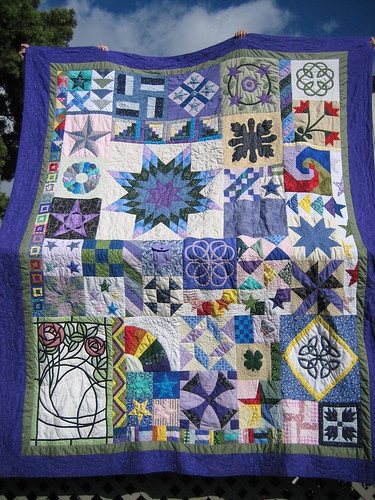
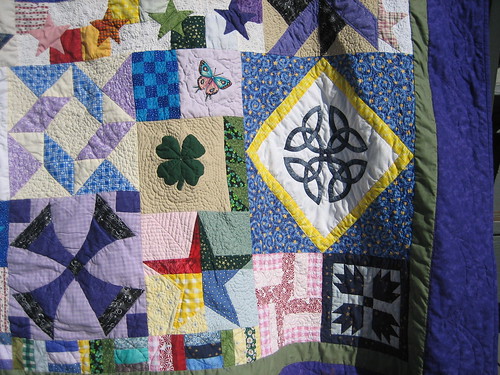
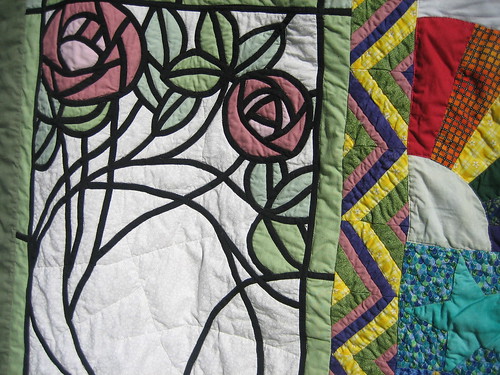
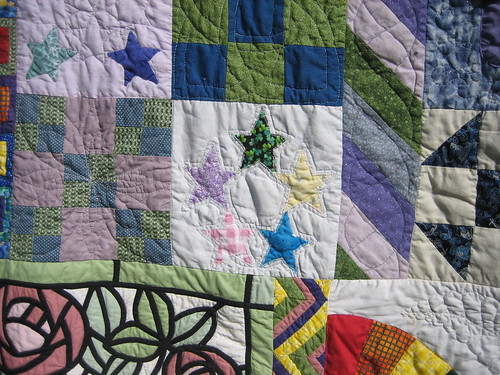
Here are some pictures of the quilt I made for my sister Lexy. It was her graduation present.

It took me almost 4 years to make it - although I did take a lot of long breaks.


The Sound of Music

Right now I am neck-deep in costumes for "The Sound of Music" which will be opening at the end of February at the Historic Iao Theater in Wailuku.

So far my biggest challenge has been fabric. There are only a couple of fabric stores on island and most of them cater to quilters or people looking for Aloha prints (Hawaiian prints). The other problem is that in addition to the limited amount of fabric available here, what is available is expensive.

Wal-Mart has some reasonable prices, but very limited stock - and it really irks me to shop there (crowds, global takeover, etc.). So I have been buying basic but important things there like muslin and interfacing. They used to have really great velcro too, but now it seems that all they've got is the adhesive stuff that you can't sew through - useless.

So I have been buying fabric online. Of course buying online can be tricky from Hawaii because there are a lot of websites that automatically charge beaucoup bucks for shipping to Hawaii (like walmart.com - total rip-off). The site that I love right now is www.fabric.com - great selection, cheap (often free) shipping, great clearance and discount fabrics, a neat design wall thing, and they'll send swatches. I bought 30-yards of black poplin for nun-habits and I'm waiting on some cute fabric for the curtain costumes (but that's a whole other story - more on that some other time).

Well, I'm off to buy some satin for a party dress for Liesl.