I'm posting to say that I've got nothing to post. After a big October of posting galore November has been decidedly non-crafty. Boo.
Of course this is mainly because I have been spending most of my free time renovating my new apartment. Yay! And getting ready for the big CATS auditions. Double yay!
Last month I closed on a short sale of a really cute 2 bedroom apartment near the theater. It's awesome and I can't wait to live in Wailuku town - too bad Marc Aurels closed. Double boo.
The 2nd bedroom will not actually be a bedroom but a crafty sewing space for creativity 'n things. So I'll be able to nicely separate my life from my hobbies, which is hard to do with all my sewing stuff in my living room.
The place is cute, but looks like it hasn't been renovated since it was built in the 70's. So we've been doing work to make it a nicer place to live.
First step: remove the popcorn ceiling. Popcorn ceiling is hideous and even if it does serve an acoustical purpose it's not worth the ugly. So we got rid of it. It's relatively easy to scrape off if you wet it a bit with a sprayer first. It is rather messy though
Second step: fix the ceiling drywall. Because they were gonna put on the awful popcorn they didn't finish the drywall on the ceiling, so that had to be re-mudded and sanded in places. Awful dusty.
Third step: paint. This was actually the only step that I had a lot to do with. I was bad at the scraping and my dad was smart enough not to let me do the mudding and sanding. But the painting I did a lot of and boy did it hurt. But it certainly made a difference. I'll post pictures soon.
Next I'll move in. Woohoo!!
Sunday, November 14, 2010
Sunday, October 31, 2010
Zombie Shoes
One last zombie post for the year - I promise. This just ended up so cool, that I had to share.
Originally I was going to wear an old pair of character shoes with my Zombie dress for Thriller this year, but I realized about halfway through rehearsing that that probably wasn't gonna work. They were a little to slippery. So I went to the mall to look for some flats that might work and while there were lots of cute shoes, there were none that I could justify buying simply to destroy.
I remembered that I had a pair of generic Ked's from Payless and I decided to make them into zombie saddle shoes.
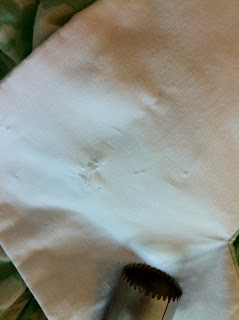
Using a couple old black fabric pens and a sharpie I turned the white keds into saddle shoes:

 Unfortunately I was running out of time and didn't take pictures of the rest of the process.
Once I finished with the fabric pens (I didn't worry too much about getting good coverage because I was gonna destroy them - and my pens were running out of ink) I painted the white parts with some watered down Rit dye (kinda like water colors). I used navy blue, cocoa brown, and gray. Then I used some green spray paint to complete the effect (the spray paint also nicely darkened the black parts even though it was green paint).
I dyed the shoe laces and a pair of socks in some gray dye. I find that when dying for zombie clothes a quick dye that isn't even (don't stir very much) works the best. Just remember that it almost always ends up lighter when it dries.
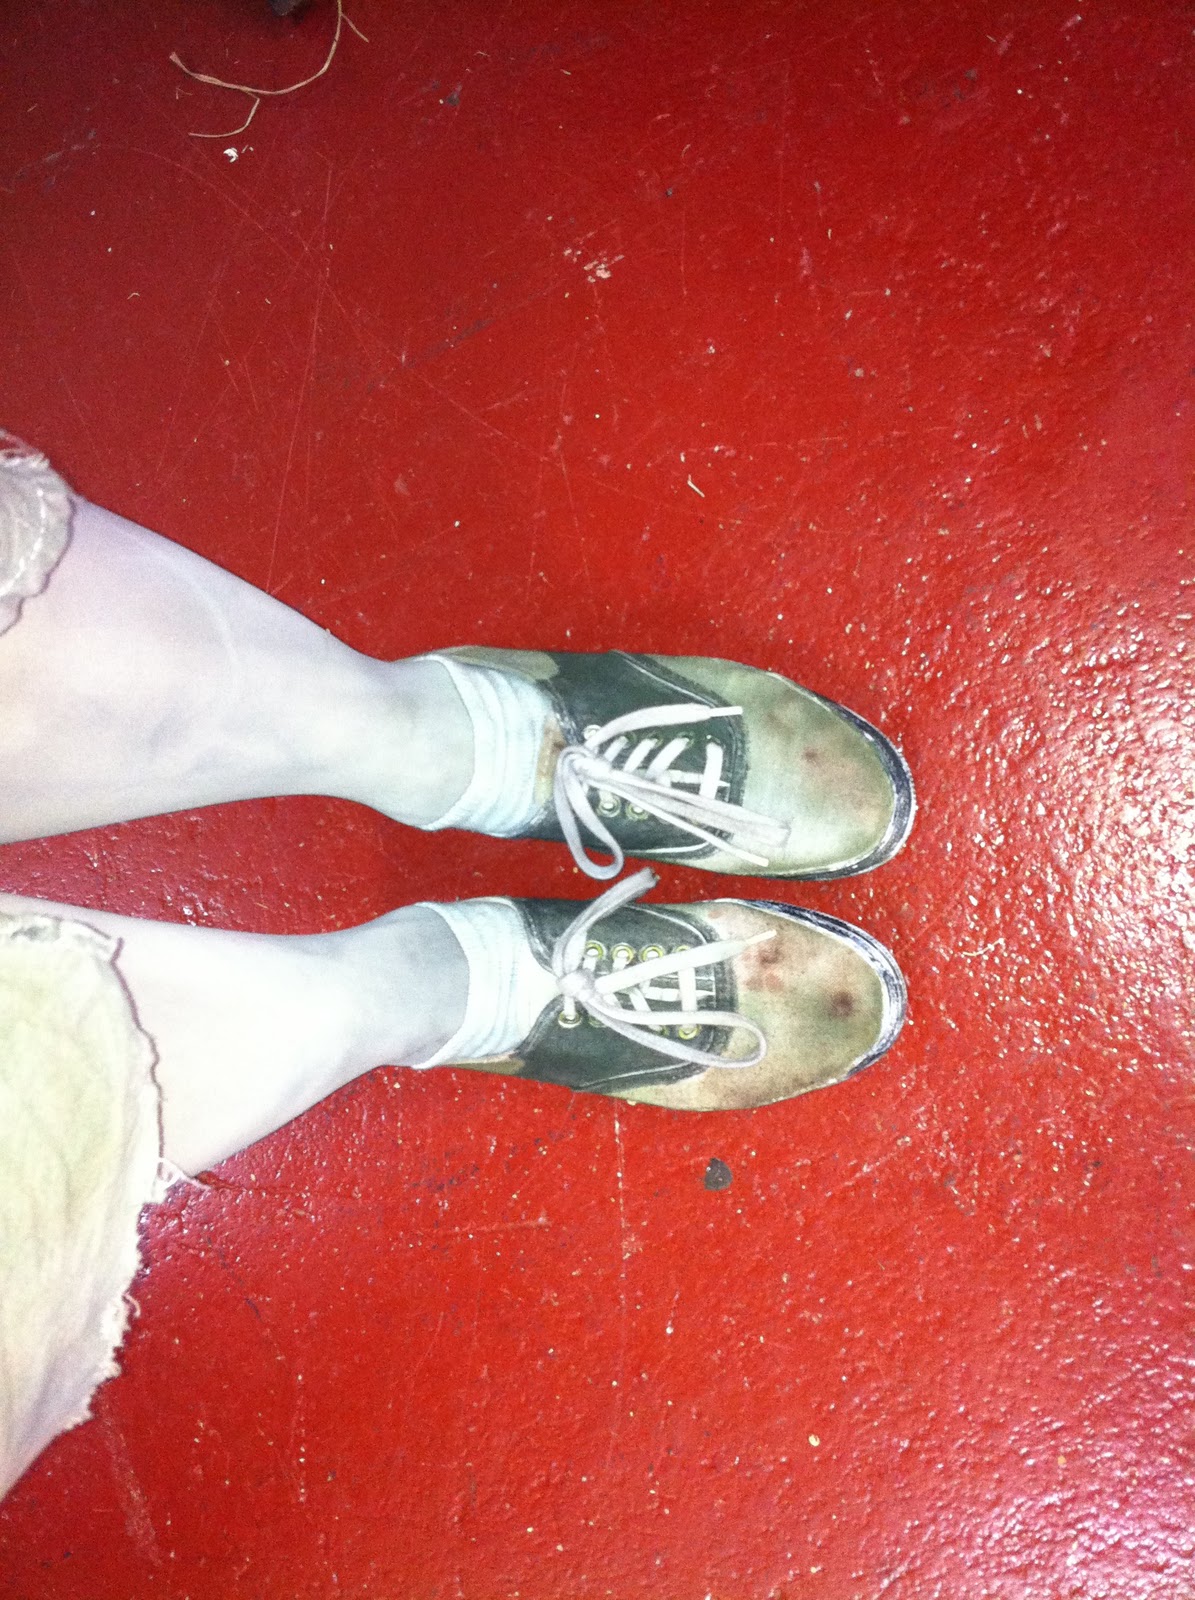
Here's the finished product:
 I really do think they made the costume. They were also super comfy and easy to dance in.

Originally I was going to wear an old pair of character shoes with my Zombie dress for Thriller this year, but I realized about halfway through rehearsing that that probably wasn't gonna work. They were a little to slippery. So I went to the mall to look for some flats that might work and while there were lots of cute shoes, there were none that I could justify buying simply to destroy.
I remembered that I had a pair of generic Ked's from Payless and I decided to make them into zombie saddle shoes.
Using a couple old black fabric pens and a sharpie I turned the white keds into saddle shoes:


Once I finished with the fabric pens (I didn't worry too much about getting good coverage because I was gonna destroy them - and my pens were running out of ink) I painted the white parts with some watered down Rit dye (kinda like water colors). I used navy blue, cocoa brown, and gray. Then I used some green spray paint to complete the effect (the spray paint also nicely darkened the black parts even though it was green paint).
I dyed the shoe laces and a pair of socks in some gray dye. I find that when dying for zombie clothes a quick dye that isn't even (don't stir very much) works the best. Just remember that it almost always ends up lighter when it dries.
Here's the finished product:

Zombie Dress Part 3
Happy Halloween!!
My stats have sky rocketed this month because of all the people wanting to make Zombie Ballerina costumes. Hopefully next year my zombie dress posts will gain some ground too.
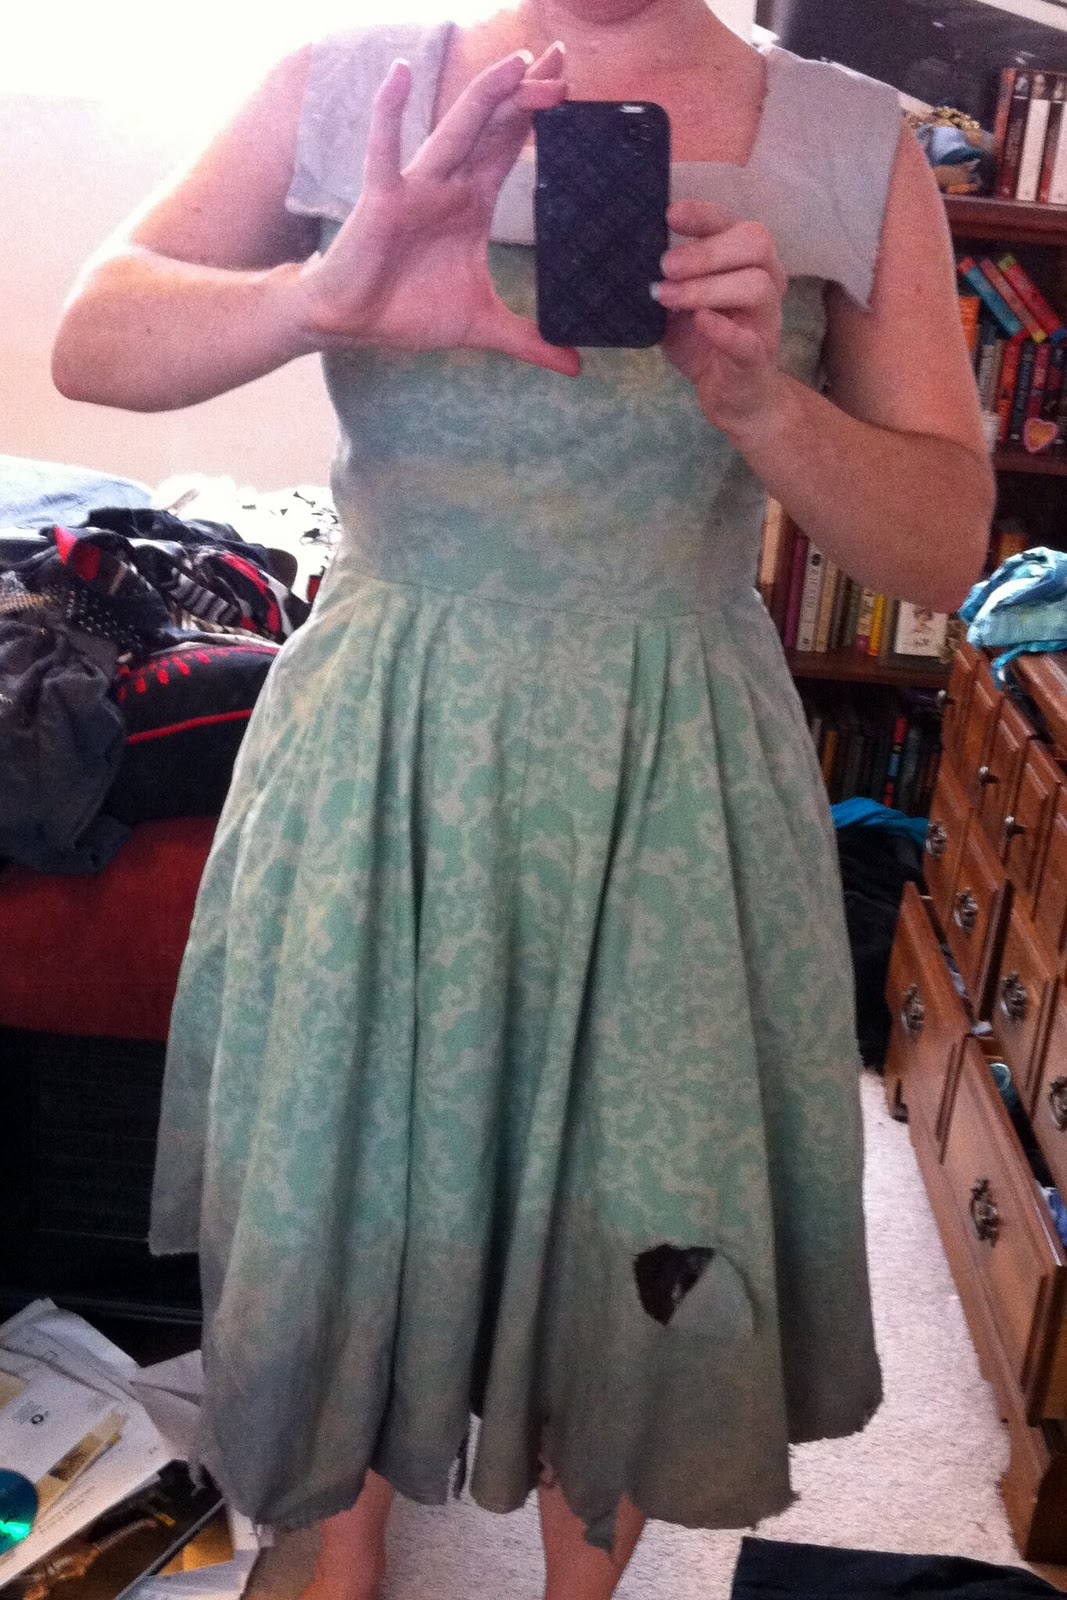
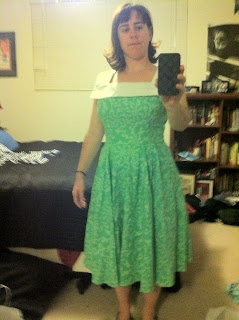
Tonight is our third night performing Michael Jackson's Thriller at the Historic Iao Theater. It's been a blast this year, and I finally have some pictures of my wonderful, complete Zombie dress.
 I ended up spray painting it a bit with some green floral spray, and I used a batch of brown synthetic wig dye (sharpie ink fillers and rubbing alcohol in a spray bottle) that I had left over from the Wedding Singer. I thought this added a wonderful effect.
I also did some extra work on my shoes. I'll go into that in the next post.
My stats have sky rocketed this month because of all the people wanting to make Zombie Ballerina costumes. Hopefully next year my zombie dress posts will gain some ground too.
Tonight is our third night performing Michael Jackson's Thriller at the Historic Iao Theater. It's been a blast this year, and I finally have some pictures of my wonderful, complete Zombie dress.

I also did some extra work on my shoes. I'll go into that in the next post.
Wednesday, October 20, 2010
Zombie Ballerina - Degas
I was going through some pictures on Facebook of last years Thriller and I found some I thought I'd share. As I've mentioned in many of my posts, I was a Zombie Ballerina in previous Thrillers. I didn't mention that I altered the costume slightly last year. I did slightly different makeup and I added some elements (mostly ribbon) to try and make the look evoke a Degas ballerina:


Saturday, October 16, 2010
Tennis Skirts 2
Update! Here's a picture of my mom's tennis team at Nationals in their adorable skirts that I made for them:

Unfortunately they didn't win, but they sure look cute.

Unfortunately they didn't win, but they sure look cute.
Friday, October 15, 2010
Zombie Dress Part 2
In the last part I made the zombie dress. In this one I destroy the dress.
I started by fading the dress in a bleach solution. It took about 30 minutes to get a slightly aged faded look:


I started by fading the dress in a bleach solution. It took about 30 minutes to get a slightly aged faded look:

The left is the original fabric and the right is the bleached fabric. My next step was to distress the fabric. I didn't want to make too many holes because it's best to start out small so you don't over do it.

I used pinking shears to mangle the hem. I like pinking shears because they will control the fraying. Since I'll be dancing and sweating in this dress I'll want to be able to wash it often, and I don't want it to fall apart more each time.
I also made a couple tears in the bottom of the skirt. I don't want to expose too much skin - because exposed skin has to be covered with makeup - so I tried to limit the holes to the lower part of the skirt.

My favorite distressing tool is my apple corer - I've never actually used it to core an apple - I bought it to make the Irish Car Bomb Cupcakes. It has a lovely serrated end that I dragged across the fabric to create little holes.

Next I tea-stained the dress in a combination of tea, an instant cappuccino pack, and some espresso grounds (I used what I had so I wouldn't have to go out, but I wouldn't recommend the espresso grounds since they never dissolve and you have to deal with them when rinsing afterward. An instant coffee or espresso would've been easier).

The tea-stain gives the dress an overall dingy look. One nice thing about making something ugly is that you don't have to worry about even coverage. Normally when dying you need to stir a lot to make sure the color is even. But because it's supposed to be dirty looking you don't have to stir too much because a mottled effect looks more like dirt. Dirt and dinginess happen inconsistantly.

The tea-stain is subtle too. This is after about an hour of boiling (it was actually dirtier looking than in the picture).
My next step was to add dinginess with regular Rit Dye. I started with Cocoa Brown and dipped about 8" of the bottom of the skirt and the collar in. The Cocoa Brown works fast, but also looks a lot like dried blood. Since I don't want to look like I died in a bloody massacre I followed up with a similar dip in Navy Blue and then an ink solution.
Note: I washed the dress in the sink with detergent after each step (bleaching, tea-staining, dyeing).

I love the dinginess on the bottom of the skirt. I think I might do a little more to stain the rest of the dress, especially the edges of the collar. I'd like to distress it and darken it some more.
I'm wearing my tutu from my Zombie Ballerina costume under the dress as a petticoat. It works pretty well, but I might see if I can find an actual one instead. I'll probably also dye some pantyhose so I don't have to put make up on my legs.
Once I have the dress finished and get all zombified I will post more pictures.
Thursday, October 7, 2010
Zombie Dress Part 1
For my third year of Thriller at the Historic Iao Theater's Annual Haunted Theater Experience I've decided to forgo the Zombie Ballerina costume and make something new. I decided to go period rather than professional this time and I bought this vintage 1955 Simplicity dress pattern:

I had to add about 2" to the pattern because the pattern was too small, and I didn't bother with the pockets because I won't need them. Here's the finished dress:
I may get a petticoat to fluff the skirt out. The next step will be to destroy and zombify the dress. I'll post another entry about what I end up doing, but right now I'm thinking I'll bleach it a little to fade the color, then distress the fabric (my weapon of choice for this is usually my apple corer), and finally dye it. I'll probably tea-dye it then dirty up the edges with a black or gray dye. I'm thinking I'll also zombify a pair of nylons so that I don't have to put makeup on my legs.
We are also doing another Zombie themed dance that is more tribal/earthy so I'll have to figure out what to do for that.
Stay tuned for more...

I had to add about 2" to the pattern because the pattern was too small, and I didn't bother with the pockets because I won't need them. Here's the finished dress:

I may get a petticoat to fluff the skirt out. The next step will be to destroy and zombify the dress. I'll post another entry about what I end up doing, but right now I'm thinking I'll bleach it a little to fade the color, then distress the fabric (my weapon of choice for this is usually my apple corer), and finally dye it. I'll probably tea-dye it then dirty up the edges with a black or gray dye. I'm thinking I'll also zombify a pair of nylons so that I don't have to put makeup on my legs.
We are also doing another Zombie themed dance that is more tribal/earthy so I'll have to figure out what to do for that.
Stay tuned for more...
Friday, October 1, 2010
Things I'm Not Proud Of
In my costuming career there's only a few things I regret. Some have to do with lessons learned about techniques and how I could have executed things better. Some have to do with uncomfortable interactions with actors, directors, or other designers. And some have to do with what I had to make. Most are comical to look back upon, or important lessons that I needed to learn. There's only one thing I've done that makes me feel icky. I'll get to that one last.
Most of the uncomfortable interactions are pretty funny to look back on. The show with the most discomfort was The Full Monty. Whenever I tell people that I costumed The Full Monty they laugh and say "well that must have been easy." It wasn't. The characters aren't naked until the end of the show. They are dressed the whole time, and need fancy tear away outfits for the final number. I really enjoyed making tear-away clothing, and the skill has come in handy quit often.
Full Monty discomfort involved mostly underwear. The main 6 guys strip down into red tear-away thongs. When I passed out the thongs the guys decided that after trying them on they needed to show me for approval. Funny looking back, but weird for me at the time. There's also the scene when they are at Harold's house and decide that they need to get comfortable with each other and strip down to their undies. The director and I had a blast deciding what kind of undies each of the guys would wear. Discussing it with the actors and buying and fitting the undies however was a little weird. I spent a lot of time shopping for men's underwear. It was also the first time that I've had to ask an actress to please wear a bra.
There's also some people that just don't wear clothes well. Either they are a strange shape, sloppy, or just awkward, but nothing looks quit right on them. There was one actor who had an issue with his pants where he would pull them up to sit and then he'd stand and the part he'd pulled up would get stuck in his crotch. I tried to discuss it with him - standing techniques and alternate underwear choices that would prevent this - but he kept blaming the pants. Those are a couple of my regrets because while I do my best to make them look good, I don't have the budget or time to tailor things to odd shaped people, or teach people how to wear clothes right. I often end up brushing these costumes off in frustration. It's my one regret from an otherwise perfect Sound of Music.
Then there's the actors who don't want to wear what you give them. Often times they have no choice - I have wonderful memories of the poor teenaged boy who had to wear lederhosen and a Tyrolean hat for Sound of Music. He kept trying to make the hat cooler by pulling it down over one eye. Most of the time we compromise over the items, but there's one pair of pink hot pants that I bought that would have been awesome for this one character and she refused to wear them. They are still in storage and I keep trying to use them, but haven't had much luck.
One reoccurring problem that I've had is costumes that blend in with the set. It's happened way more times than I'm proud of. Also, not entirely my fault. I didn't always know what the sets were gonna look like. There was this perfect patterned green dress that blended in perfectly with sponge painted pattern on the walls of the set. And she wore the dress for half the play so I had to find all kinds of aprons and sweaters she could wear to cover it up. The set designer in Steel Magnolias painted the set pink. Shelby's color is pink and she wears it the whole time. I now try to go into a show with better communication of set colors, but that's not always known.
When costuming you don't just get to do the pretty stuff. There's also the ugly things or the mean things. I always feel a little bad when distressing perfectly good clothing, but the actual distressing is so much fun that I get over it quick. But then there's certain characters that have to look certain ways. Whores have to be slutty, "large lady" has to be fat, and Nazi's have to wear swastikas. For Sound of Music I pawned off the making of the Nazi arm bands to someone else - I feel a little bad about it, but not too bad.
I've gotten used to most of it, but there's still the one thing that makes me feel icky, and strangely it's from one of my favorite plays that I've worked on: The Foreigner. It's a funny, touching comedy about diversity overcoming racism and prejudice. In this show the bad guys in the climax of the play are the Klan. The show takes place in Georgia and the characters have a confrontation with the Klan. So I had to make a dozen Klan robes. That was awkward. They are now all packed up in a box and hidden in costume storage somewhere like a dirty skeleton in the costume closet.
And karma's given it back to me. All of the actors who were put in ugly costumes that they didn't like, or outfits that didn't flatter them, or had to wear costumes that were hot or heavy, they got their revenge last summer. I was cast as Dawn in Best Little Whorehouse in Texas, and as I said before whores have to be slutty. When I first put on this one costume I knew that it was costuming revenge for whatever I had done to actors or would do in the future.

Look at all that fishnet! OMG and my whiteness shining through those little holes like beacons. Yikes! The side/back cutout that shows off my love handles so well. Ack! But I wore it, proudly. And now I have very few inhibitions left:

Tada! That's me in Wedding Singer. Later in that number we all strip and I do more of this in a bustier. Hooray for double-stick tape.
Thursday, September 16, 2010
Fabric Oath
I am in the process of buying a bigger apartment that will have an extra room that I will use for sewing/crafting. Because of the expenses involved with moving and preparing my old place for rent, and the general need to get rid of stuff I am making the following oath:
I swear that I will not buy any new fabric for myself (excludes projects I'm getting paid for, or gifts for others - Christmas is coming up, yikes!) until I finish at least one of the following projects that I already have fabric for:
Lonestar Quilt
Zig-zag Quilt
Zombie Dress
Floral Satin Dress
Celtic Quilt
Amish Quilt
This oath should probably include genral crafting supplies, but I don't want to get too crazy.
Thursday, September 9, 2010
Cherry Pinot Noir Waffle Syrup
It's Waffle Week. Yay!

I used Pinot Evil Pinot Noir because it's got an awesome name, and I love their Pinot Grigot version.


This year I celebrated with a small waffle party with friends. I made a bunch of waffles and had people bring in toppings. I also decided to make a Cherry Pinot Noir Waffle Syrup from a recipe I found at MrBreakfast.com.

I used Pinot Evil Pinot Noir because it's got an awesome name, and I love their Pinot Grigot version.

I trippled the recipe because I wouldn't have used the extra cherries or Pinot Noir. I also was unable to find the star anise or it's substitute, anise seeds, on Maui, so I left it out.

I ended up simmering the batch a lot longer than the recipe called for. While this was probably necessary, I definitely simmered it for longer than I should have because it thickens a lot as it cools. Mine ended up more the consistancy of jam than syrup, but it was rather tasty, especially with the Cranberry Orange Waffles.
Friday, September 3, 2010
Spongebob Squarepants Costume
In college I majored in physics and I minored in theater. Strange I know. Neither my physics professors nor my theater professors really got it, but I think the two compliment each other marvelously. Well, my theater minor included mostly costume classes: Costume History, Costume Construction, Clothing and Culture, and Costume Design.
I took Costume Design my senior year and during the fall quarter we had an assignment for Halloween to make a 3 dimensional costume that concealed our identity. At the time I was watching a lot of cartoons on cable because we never had cable when I was growing up. I watched Sailor Moon, Tenshi's Universe, Dragonball Z, and Spongebob Squarepants. So I decided to make a Spongebob costume.
I had a large box from a blanket I'd ordered online and it fit over me pretty well. I cut out arm holes and eye holes and painted. I created a 3-D nose out of yellow vinyl (my mother works at a sign shop and often gives us the leftover scraps of vinyl that they cut letters and images out of).
I paired the box with a white t-shirt and my khaki shorts and black shoes with white socks:

The costume was a little cumbersome to wear, and my costume class was at 8:30 in the morning so it was a little chilly to be walking around in shorts.
Sunday, August 29, 2010
Tennis Skirts
A couple posts ago I talked about Sewing with Knits and some tennis skirts I'm making for my mother's tennis team. In this post I'll go over how those skirts are actually made.
To make the patterns for the skirts most of the ladies gave me a skirt that they liked and I extrapolated the necessary measurements from the skirts. But they all follow similar ratios that can be used to make a simple tennis skirt for most women. All you need is a waist measurement (or measurement for where you'd like the skirt to sit) and a desired length.
Materials needed are:
1/2 yard of 60" spandex or lycra (swimsuit fabric)
1 yard of 3/4" elastic
Twin Stretch Needle
The length of elastic needed is the waist measurement + 1" for overlap.
The rest of the skirt will be two trapezoidal panels. The top of each panel will be half the waist measurement + 2" for stretch + 1" for seam allowance. The side lengths I've worked with range from about 13" to 17" depending on where the skirt is worn (waist vs hips) and how long (or short) you want the skirt to be. You'll need to add 3/4" for the waist band and 5/8" for the hem. The bottom of each panel can range from 5" to 9" more than the width of top the panel.
Below is a diagram with the measurements for the panels for a med sized tennis skirt (29" waist):

Cut 2 panels from the fabric.
With right sides together sew up the sides (angled sides) using either a serger or a zig-zag stitch. Overlapping the ends by 1" sew the elastic into a band. Pin the elastic to the wrong side of the fabric with top edges even and distribute fullness (I like to half, then quarter each and mark with pins). Serge the top edge stretching the elastic to fit the waist of the skirt.


The waistband should look like this once the elastic is attached:

To finish the waistband, fold the elastic under, pin in place and sew from the right side of the skirt using a twin stretch needle stretching the elastic to even out the skirt fabric. You can use the elastic as a guide since you can't see the edge that's being hemmed. Since it's a 3/4" elastic I like to line up the top edge of the skirt with the 5/8" line on my sewing machine face plate to account for the needle offset.

The bottom of the skirt is hemmed the same way, except that you don't have the handy guide of elastic so you need to mark where to fold to get a 5/8" hem. Pin the hem and then sew from the right side of the skirt using the twin stretch needle (for the 5/8" hem I align the edge of the skirt with the 1/2" line on the face plate.
Ta da! Tennis skirt (or bathing suit skirt).

To make the patterns for the skirts most of the ladies gave me a skirt that they liked and I extrapolated the necessary measurements from the skirts. But they all follow similar ratios that can be used to make a simple tennis skirt for most women. All you need is a waist measurement (or measurement for where you'd like the skirt to sit) and a desired length.
Materials needed are:
1/2 yard of 60" spandex or lycra (swimsuit fabric)
1 yard of 3/4" elastic
Twin Stretch Needle
The length of elastic needed is the waist measurement + 1" for overlap.
The rest of the skirt will be two trapezoidal panels. The top of each panel will be half the waist measurement + 2" for stretch + 1" for seam allowance. The side lengths I've worked with range from about 13" to 17" depending on where the skirt is worn (waist vs hips) and how long (or short) you want the skirt to be. You'll need to add 3/4" for the waist band and 5/8" for the hem. The bottom of each panel can range from 5" to 9" more than the width of top the panel.
Below is a diagram with the measurements for the panels for a med sized tennis skirt (29" waist):

Cut 2 panels from the fabric.
With right sides together sew up the sides (angled sides) using either a serger or a zig-zag stitch. Overlapping the ends by 1" sew the elastic into a band. Pin the elastic to the wrong side of the fabric with top edges even and distribute fullness (I like to half, then quarter each and mark with pins). Serge the top edge stretching the elastic to fit the waist of the skirt.
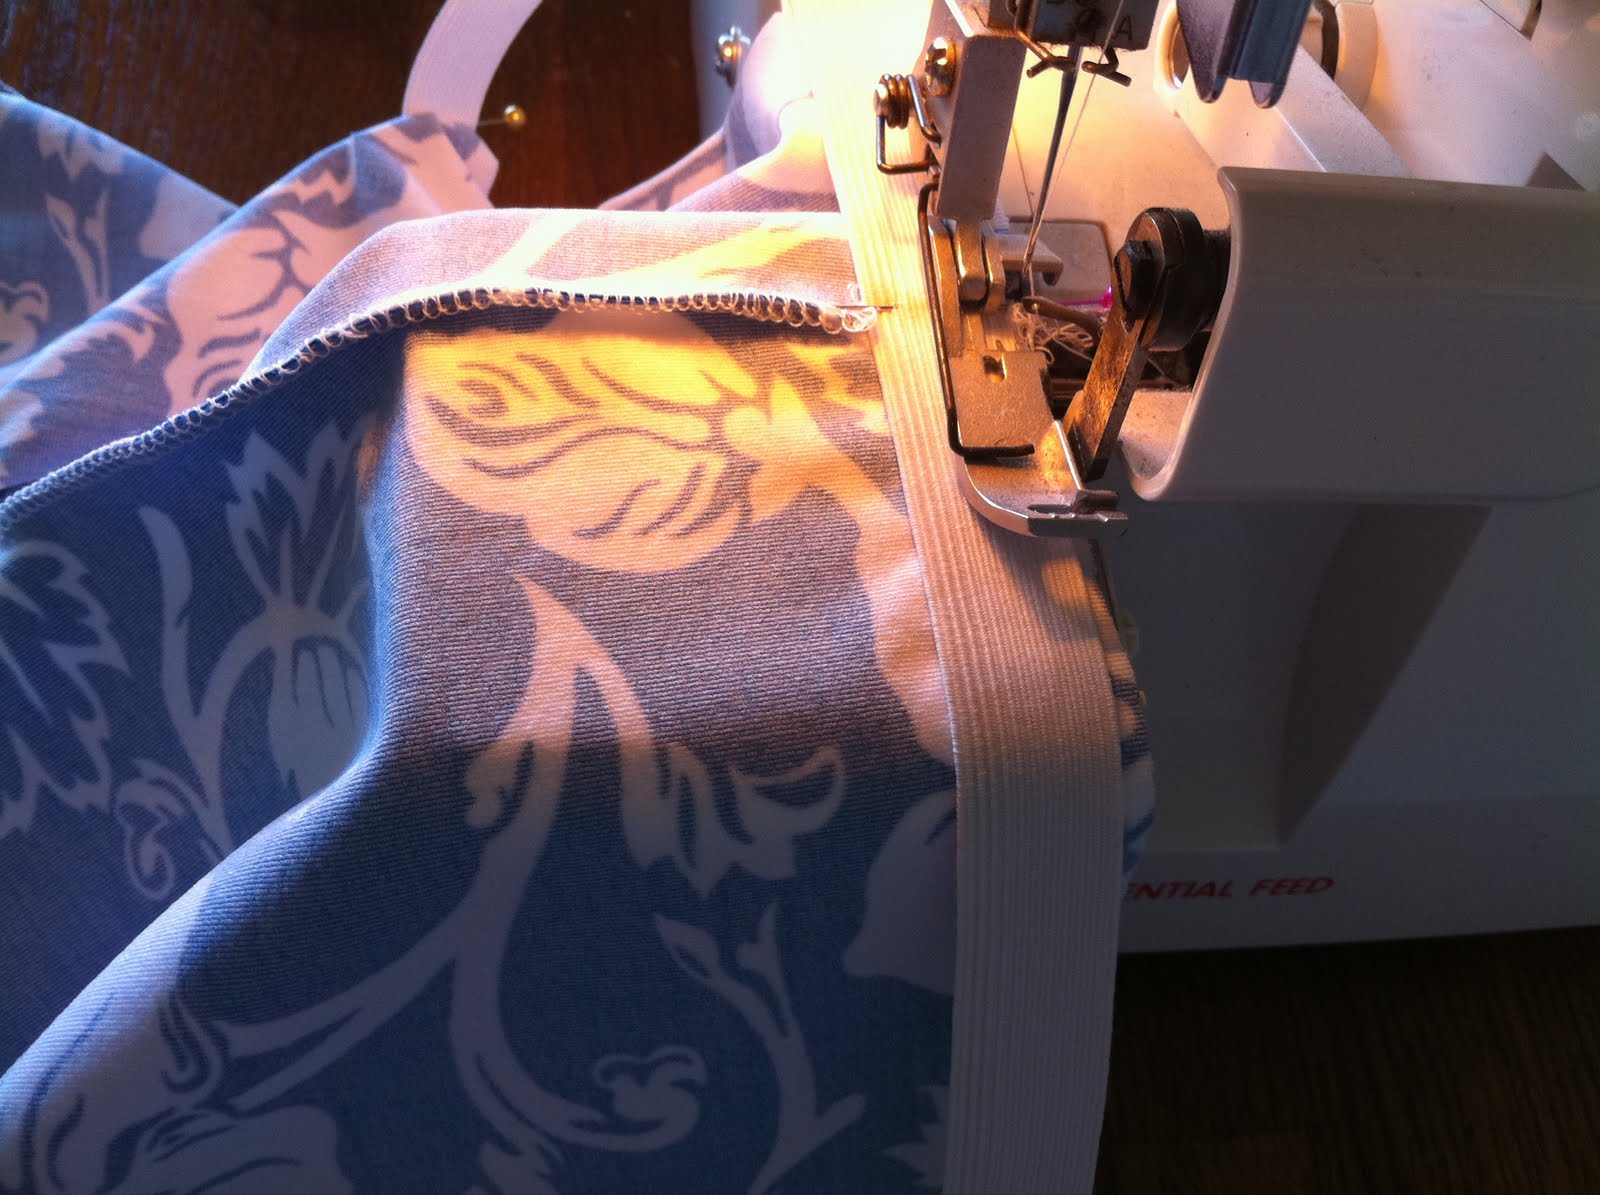

The waistband should look like this once the elastic is attached:

To finish the waistband, fold the elastic under, pin in place and sew from the right side of the skirt using a twin stretch needle stretching the elastic to even out the skirt fabric. You can use the elastic as a guide since you can't see the edge that's being hemmed. Since it's a 3/4" elastic I like to line up the top edge of the skirt with the 5/8" line on my sewing machine face plate to account for the needle offset.
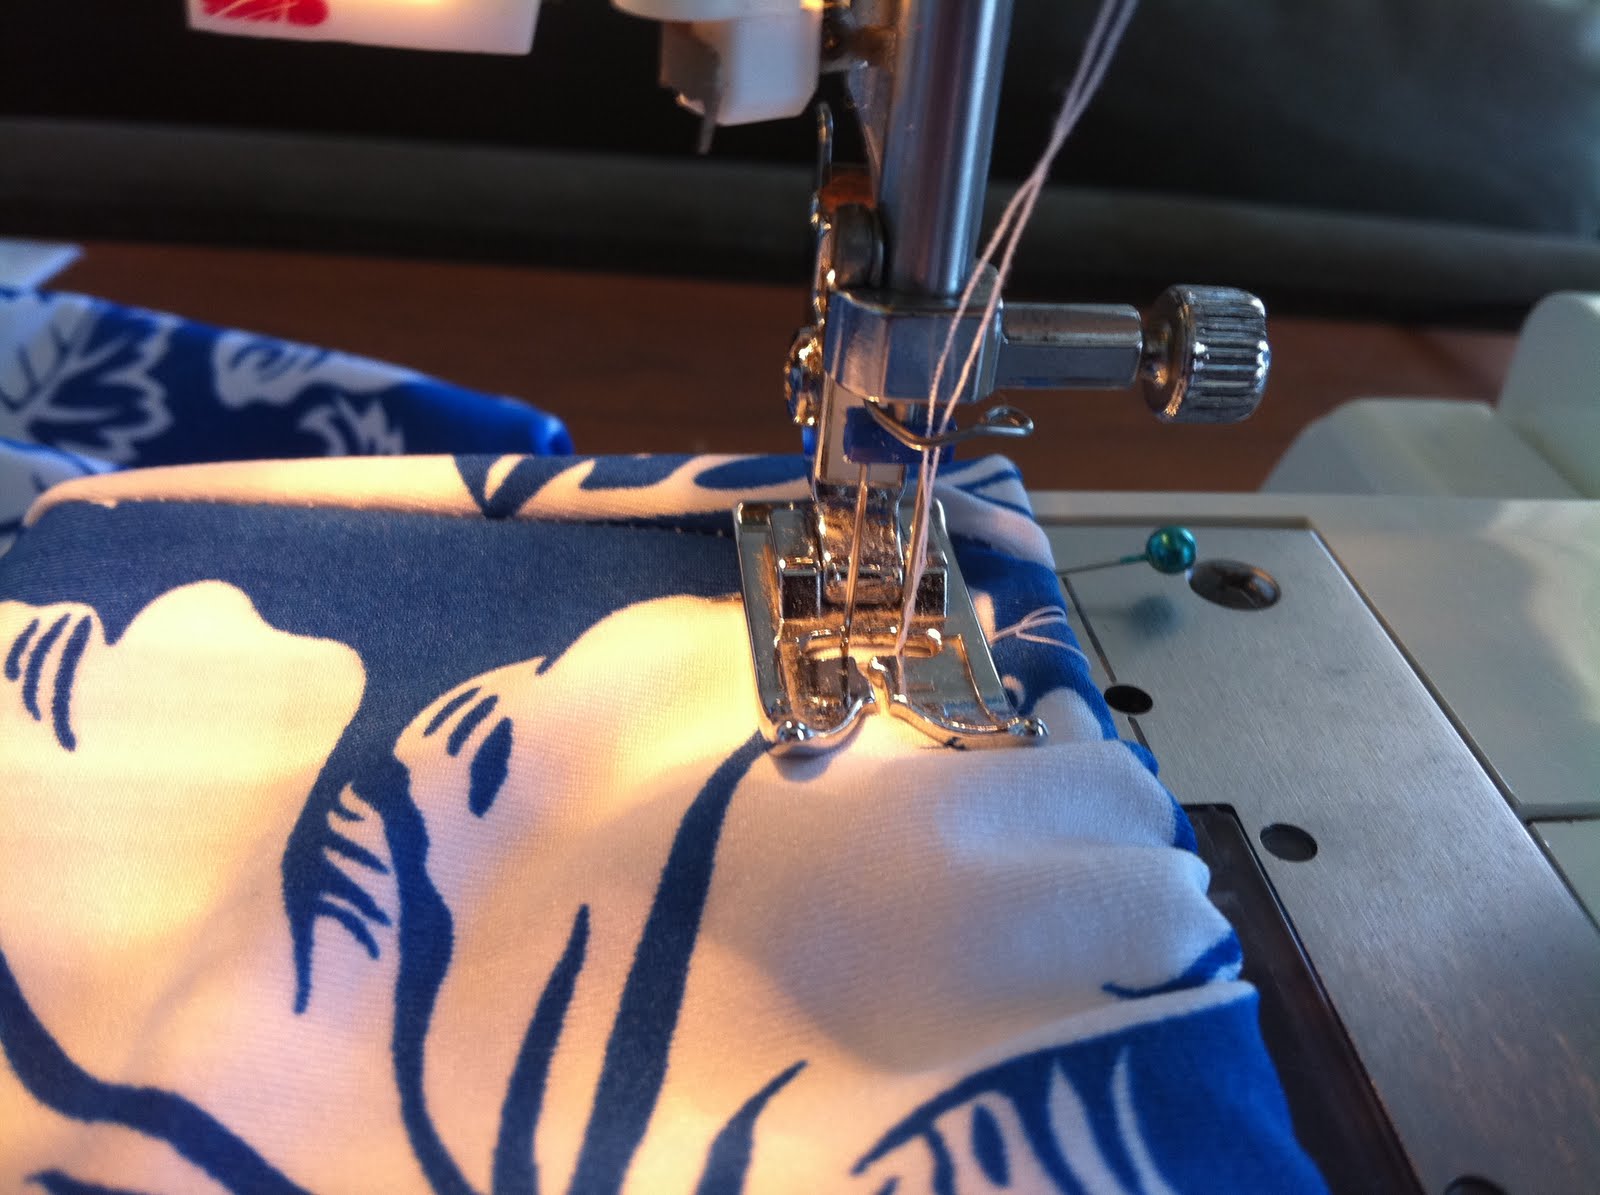
The bottom of the skirt is hemmed the same way, except that you don't have the handy guide of elastic so you need to mark where to fold to get a 5/8" hem. Pin the hem and then sew from the right side of the skirt using the twin stretch needle (for the 5/8" hem I align the edge of the skirt with the 1/2" line on the face plate.
Ta da! Tennis skirt (or bathing suit skirt).


Monday, August 23, 2010
Turkey Pesto Waffle Sandwich
Tomorrow, August 24th, is National Waffle Day - YAY!!!
Two weeks from now is Waffle Week, so there's lots more waffle excitement to come. Consider this a preview of wonderful waffleness yet to come!
Tonight for dinner I made a Turkey Pesto Waffle Sandwich. It was awesome. To make such a culinary delight you take two frozen waffles, spread pesto on one and top with turkey and provolone (or your preference of cheese). Sandwich with the other waffle and butter the top of the sandwich. Heat butter in a frying pan and put the sandwich in buttered side up.

Press the sandwich with the back of a spatula and flip occasionally cooking until the cheese is melted and the waffles are golden.

Yum yum yum yum yum.
The sammich can also be made with ham and cheese and Dijon mustard.
Thursday, August 19, 2010
Sewing With Knits
I am currently working on a job for my mom's tennis team. They will be going to Nationals in Indian Wells, CA in october and wanted cute, matching, Hawaiian print skirts to wear while competing. My mom asked me awhile ago - while I was overwhelmed with Wedding Singer costuming - and I agreed knowing that I'd be working with a fabric that would be new and different and potentially very, very challenging.
Fashionable tennis skirts these days - well on Maui at least - are really more like bathing suit skirts. Pretty simple, made from lyrcra or spandex. But while the patterns are very basic, the fabric can be tricky to work with.
Sewing with knits, or any fabric that stretches is different from sewing with regular fabric because regular seams don't stretch. So, you need to use stitches that do stretch.
The best thing to use for sewing with knits is a serger. It creates that fancy overlock stitch that is found on all commercially produced clothing. I have a serger, though I use it mostly for creating a strong covered edge for regular seams - it helps to prevent raveling.
The next best thing for sewing with knits is a twin needle, specifically a stretch twin needle. A serger creates an overlock so it requires an edge. To get a nice edge it is equipt with a knife that cuts the edge just to the right of the inside of the seam. This means that a serger really doesn't work for hemming.
To get a stretch stitch on a regular sewing machine the easiest thing to do is use a zig-zag stitch. The zig-zag will allow for stretch. However, a slightly better, more professional looking seam comes when you use a twin needle. This is two needles spaced apart by a couple millimeters with a crossbar and a single end that goes into the sewing machine like a regular needle. You need to thread the sewing machine with two threads and thread each needle with it's own thread. Nothing changes with the bobbin. Because of the two needles the bobbin thread gets zig-zagged between the two and this creates the stretch.
I'll post pictures as I go.
Friday, August 6, 2010
Wedding Singer - Pictures
The show is over, but here's some pictures. Yay!

This is the end of the opening number "It's Your Wedding Day." It was my wedding day. I am the bride at the top.

The band, "Simply Wed."

Glen Guglia in his "Delorian"

Linda leaving Robbie a note at the alter.

Robbie and Julia try to convince themselves that it's "Not that Kind of Thing" while shopping with some iconic couples: On the right is Han Solo and Princess Leia, in the middle (half hidden) is Sid and Nancy, and on the left is Baby and Johnny (from Dirty Dancing). There was also an Iconic T-shirt couple with "Frankie Say Relax" and "Wake Me Up Before You Go-Go."

The bridge and tunnel crowd in New York City.

In a "Material Girl" sequence Holly realizes that the one that she wants can often be "Right in Front Your Eyes."

Robbie contemplates being "Single."

Robbie recruits some celebrity impersonators to help him find Glen and Julia in Vegas. From left to right: Ronald Reagan, Robbie, Mr. T, Tina Turner with Billy Idol behind her, Imelda Marcos, and Cyndi Lauper in the front.

The Finale.
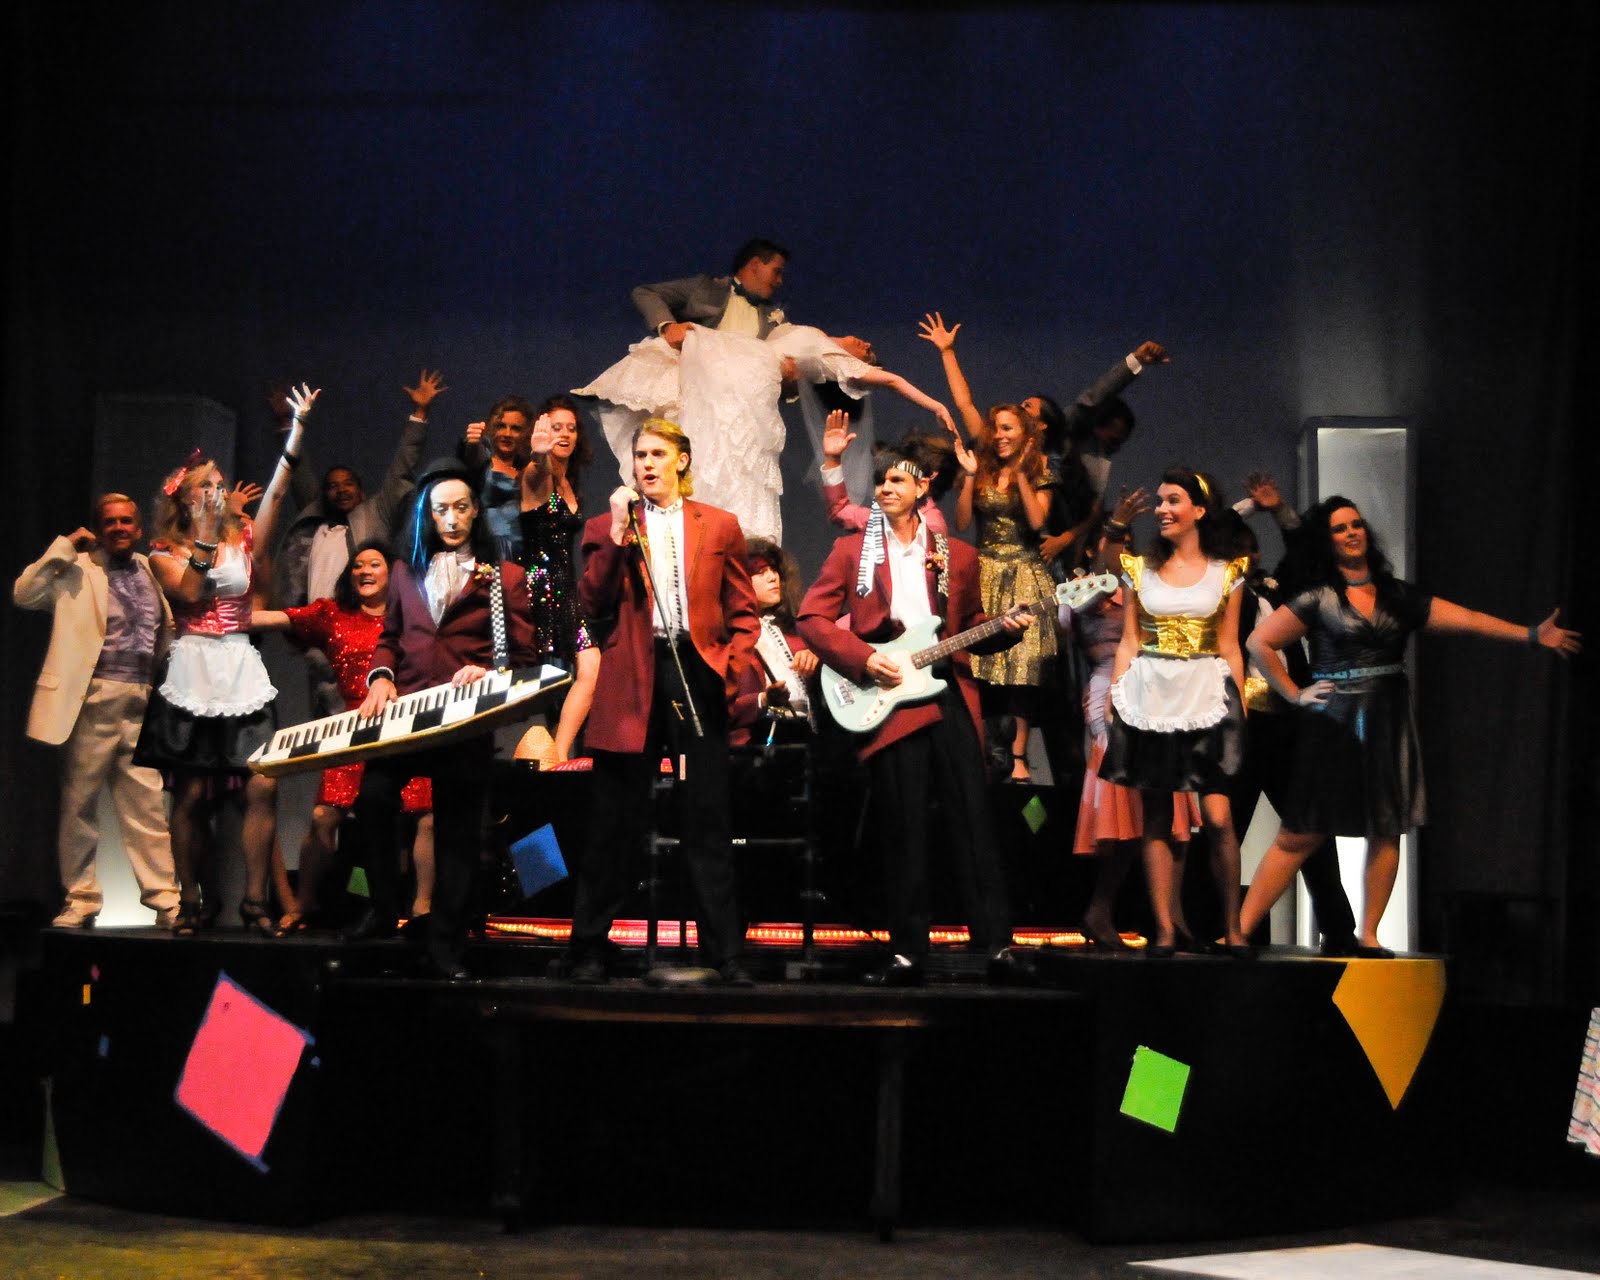
This is the end of the opening number "It's Your Wedding Day." It was my wedding day. I am the bride at the top.

The band, "Simply Wed."
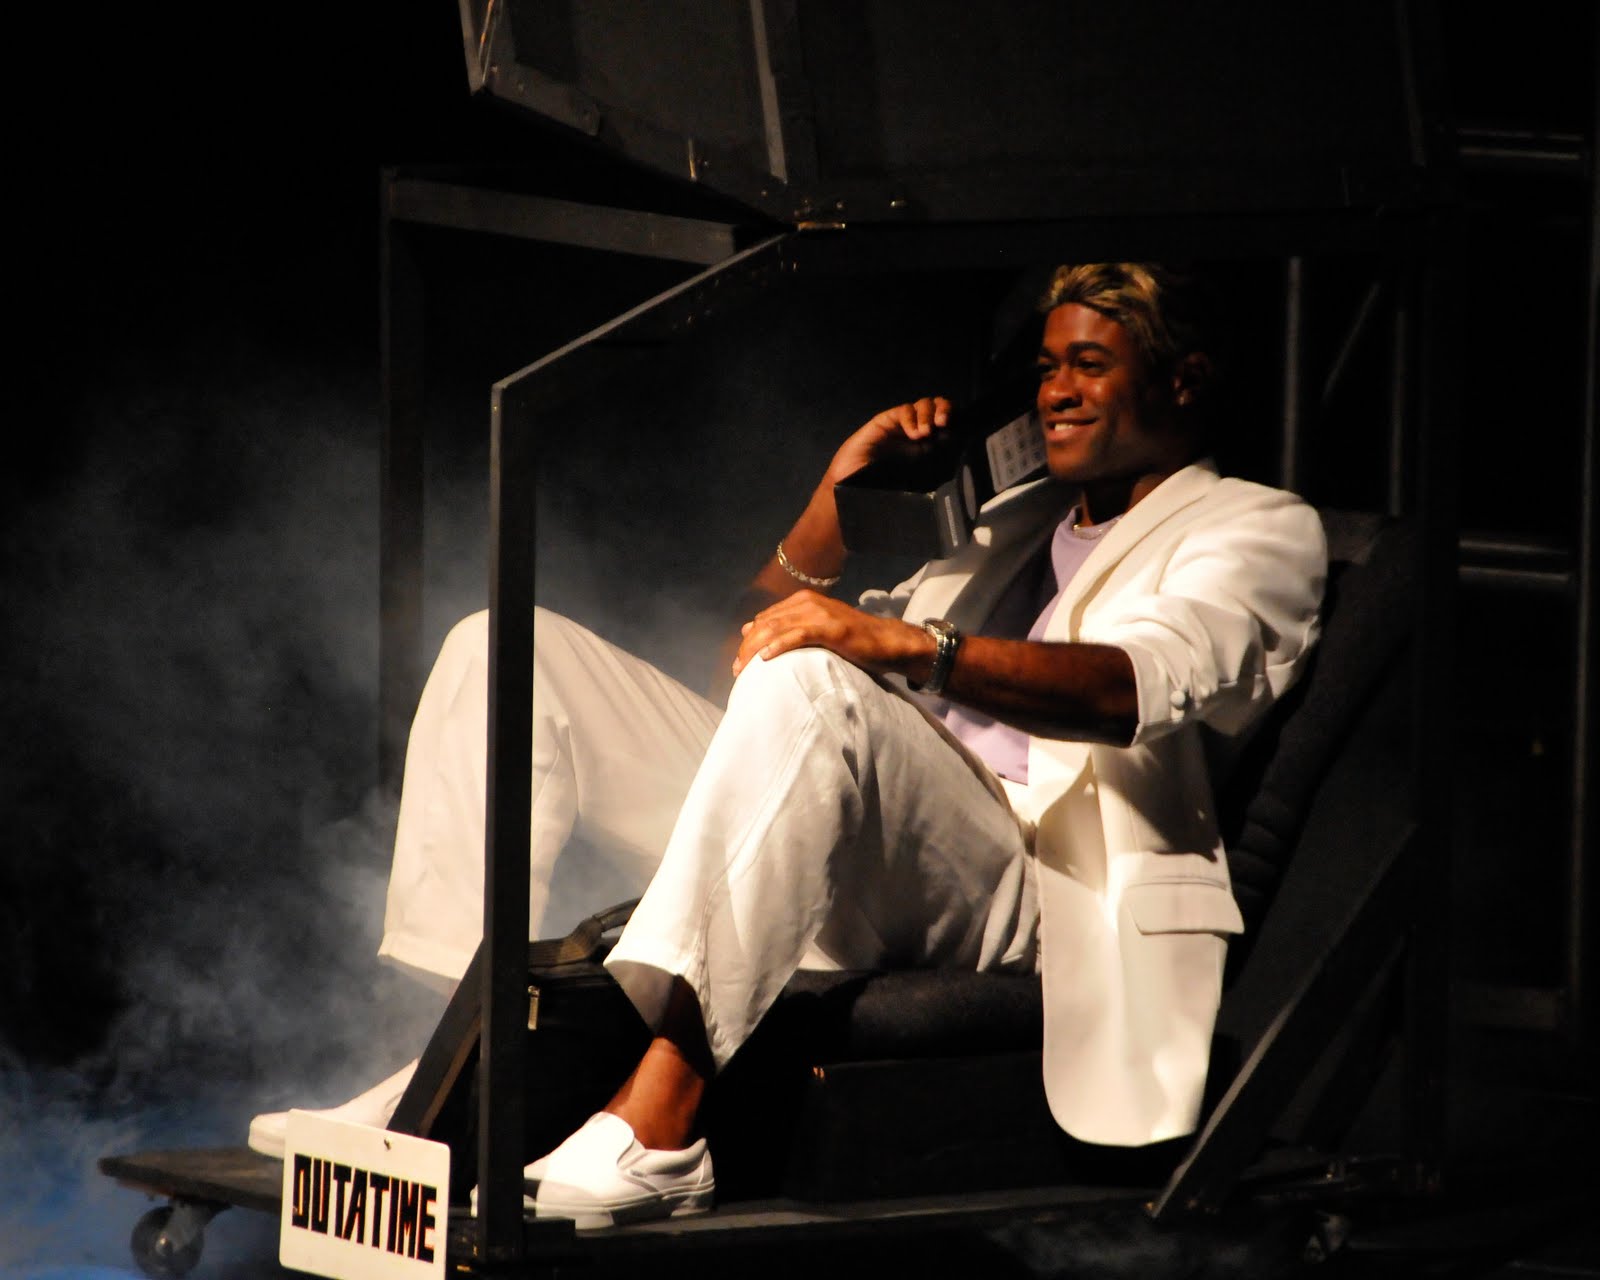
Glen Guglia in his "Delorian"

Linda leaving Robbie a note at the alter.

Robbie and Julia try to convince themselves that it's "Not that Kind of Thing" while shopping with some iconic couples: On the right is Han Solo and Princess Leia, in the middle (half hidden) is Sid and Nancy, and on the left is Baby and Johnny (from Dirty Dancing). There was also an Iconic T-shirt couple with "Frankie Say Relax" and "Wake Me Up Before You Go-Go."

The bridge and tunnel crowd in New York City.

In a "Material Girl" sequence Holly realizes that the one that she wants can often be "Right in Front Your Eyes."

Robbie contemplates being "Single."

Robbie recruits some celebrity impersonators to help him find Glen and Julia in Vegas. From left to right: Ronald Reagan, Robbie, Mr. T, Tina Turner with Billy Idol behind her, Imelda Marcos, and Cyndi Lauper in the front.

The Finale.
Friday, July 30, 2010
Crafty Wish List
Since I've already posted my Crafty To-Do list I thought I'd post a more theoretical list of things I would like to do or would like to learn how to do:
1. Home renovation/interior design: I am in the process of buying a new condo. My lovely 1-bedroom condo isn't big enough for my sewing stuff so I'm trying to get a bigger place with a room just for crafting (mainly to contain the chaos and to separate the crafting from the rest of my life). I just made an offer on this great place up the road from the theater but it looks like it hasn't been renovated since the 70's. Everything's in great condition, it's just not a style that's to my liking. So I see big projects in the future involving cheap upgrades to my (potential) new home.
2. Blog more: I would like to blog more, the problem is I usually forget to take pictures of my craftiness as it's happening. I will try.
3. Knitting/scrapbooking: I've been avoiding these two things because they seem to be too big of a fad right now. Everyone is knitting or scrapbooking and I try to do things that are a little more unique. Still, because of the popularity of both I keep finding awesome things to do with both so it'd probably be worth learning to do.
4. Sewing classes: UH - Maui College (formerly MCC) has a fashion technology associates degree and it has some clothing construction classes that I would love to take. Most of my sewing skills are self taught so it would be nice to learn better ways to do things.
That's just a start because I keep seeing things that I'd like to learn how to do but probably never will (yarn lei-making).
Thursday, July 22, 2010
Crafty To-Do List
Now that Wedding Singer is open and I have no required crafting projects to do, I have been reflecting on all the things I've wanted to do but haven't had time for, and the things that are coming up that I should start thinking about. So, here is my Crafty To-Do list:
1. Tennis Skirts: This is actually a job I have coming up to make skirts for my mom's tennis team that is going to Nationals in Indian Wells, CA in October. I'm not quite sure how many I need to make, but they should be pretty simple to do.
2. Zombie Costume: Thriller is coming up again and since this is the third year, I feel like it's time to make a new zombie costume. While I love my Zombie Ballerina costume, I think it's time for something new (I'll probably let someone else use the costume since zombie ballerina is usually a popular choice that I've always had dibs on). This year I'm thinking Rockabilly Zombie. I've got a great pattern and fabric picked out and I just love dyeing and distressing things.
3. Dress for Lexy's friend: For Lexy's birthday last year I made her a sundress and now one of her friends wants one too. Pretty easy to do, just need to get the fabric.
4. Quilt for Annie: Annie graduates from college next May (she'll be a Doctor of Pharmacy) and I'm planning on making her quilt since Lexy got one for her graduation from high school. I've started it (Lonestar Quilt) I just need to finish it.
5. Other: I'm sure other things will come up. I also should start using up all the extra fabric I have - that might be an interesting challenge.
6. Waffle Week: I don't know what I'm gonna do, but it's coming up in less than 2 months!
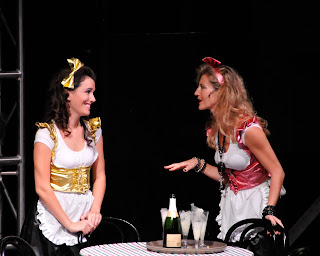
Wedding Singer - Shiny Dirndls
One of the few well planned out costumes for Wedding Singer were the waitress uniforms for Julia and Holly (the script actually calls for a third waitress, but we cut the part and gave her line to a wedding guest). I found this picture online while researching 80's costume ideas:


So, I drafted (for the first time since college) what I wanted to do for the waitress uniforms:

In the end I decided to go with fuller skirts because of movement. I made black satin skirts with a wide elastic waistband. Sewing onto the elastic was tricky and I did it wrong - I used a zigzag stitch which didn't work out wonderfully because the zigzag function on my sewing machine isn't working right. After some research I now know how to do it right (double needle) to avoid stretch issues the next time.
The director thought we should have different colors for the different waitress so Julia's is gold and Holly's is pink (I also bought a turquoise for the 3rd waitress - I still have the fabric).


Subscribe to:
Posts (Atom)